In the process of installing a computer with a printer, we sometimes encounter a number of errors, such as an uninterrupted installation, a non-receipt printer, a blank document, or an error. No signal is received between the computer and the printer. On this screen, there is a Windows error message that can not be connected to the printer. Windows can not connect to the printer.
You have re-checked the printer's signal and the installation steps on the computer, but no results and still have error message do not recognize the connection. This is one of the common mistakes on Windows 7 computers, as we proceed to install the printer. So how can we overcome the situation that Windows can not connect to the printer?1. Windows error can not connect to printer:
If you see the message Windows can not connect to printer and error code As shown below, it may be due missing mscms.dll file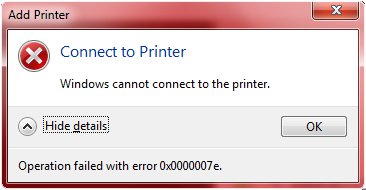
Step 1:
First, you access the following path: C: Windowssystem32 and select the file named mscms.dll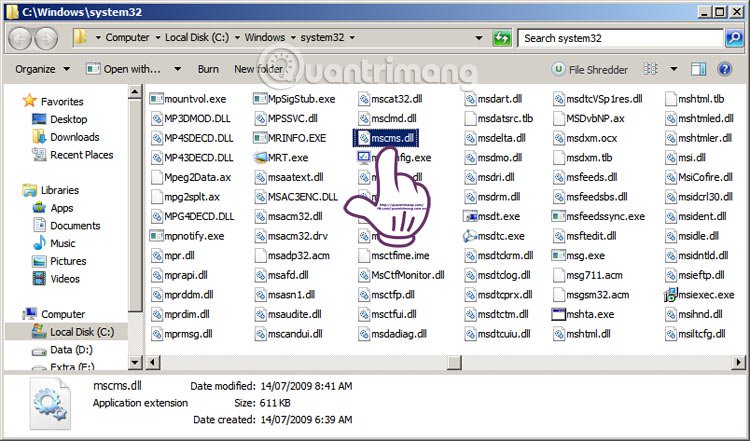
Step 2:
Next, we will copy file mscms.dll Click on the directory on your computer under the path below:- C: WindowsSystem32spooldriversx643 if you are using Windows 7 64-bit
- C: windowssystem32spooldriversw32x863 if you are using Windows 7 32-bit
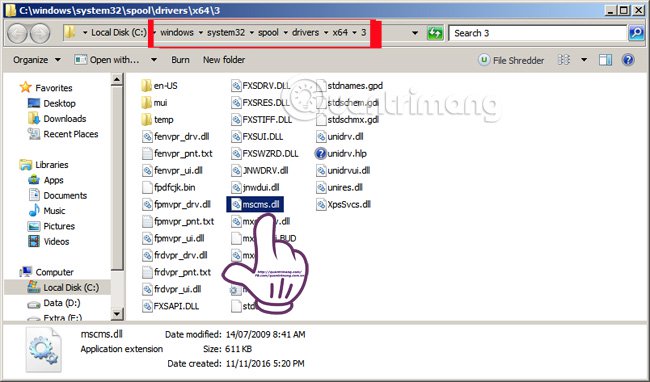 Finally, we restart the printer and perform a shared printer operation on the LAN as usual. We will not see the error message above and we will reconnect to the printer.
A printer on the network can be connected via Ethernet or Wi-Fi, or it can be connected directly to a USB port on a networked computer. Sharing a printer on a server or on a computer with a printer connected via USB can be shared with other users on the network.
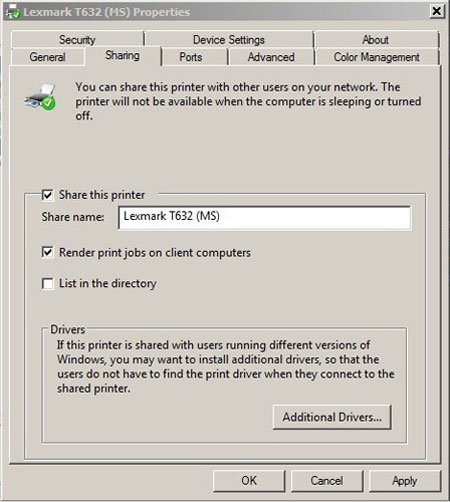
Windows has a named Add Printer Wizard is accessed from Devices and Printers in Control Panel . (For older Windows versions including Vista, this section is Printers ). Adding printers is quite different in detail on different versions of Windows. But the general steps, basically the same.
Clicking on the link Add Printer, Windows will automatically search for printers on the network. When the printer is found, it will pop up and you can select and print.
Troubleshooting 101:
Of course, the printer can sometimes not be installed successfully. It may not appear in the list of available printers, or you may receive a message that Windows can not connect to the printer. The first step is to check that the printer and the computers you want to add are on the same network and that the printer sharing feature of the computer connected directly to the printer is turned on.

If no printer is listed in Add Printer Wizard Or can not connect when click on its name. Now click on the link named "The printer that I want is not listed" . The name of the printer that you want to connect to is not in the Add Printer Wizard.
IT departments often default to the name of the printer on the network. Although this is true about security or business principles, it can fundamentally interfere with some people who want to connect to legitimate printers.
In the next window you will be given the choice of adding a local printer or adding it from a wired network, or wirelessly, or by connecting to a Bluetooth printer. You should use the second option.
4. Add a printer not listed:
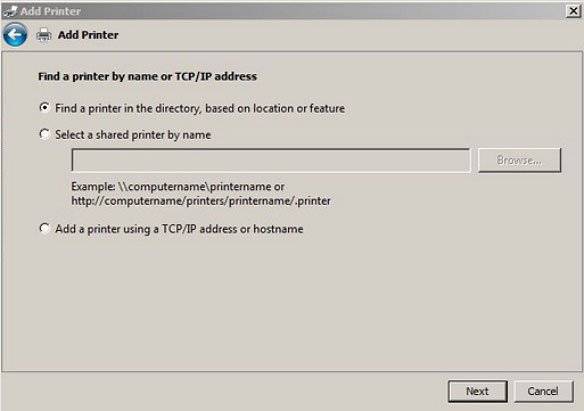
The next item in the window Add Printer Wizard was Find a printer by name or TCP / IP Address (find a printer by name or TCP / IP address).
Actually there are three options: You can search in folders, but if the first window in the previous step does not have a printer name, this option will not appear.
For options "Select a printer by name" , you can enter the name of the printer to connect with the template COMPUTERNAMEPRINTERNAME , where COMPUTERNAME is the name of the server (or computer on which the printer is installed) on the network. It can be found through Control Panel - & gt; System and Security - & gt; System (in Windows 7 ). If you do not know the name of the printer (PRINTERNAME), ask the user directly for the printer or contact the IT department in the office for a name.
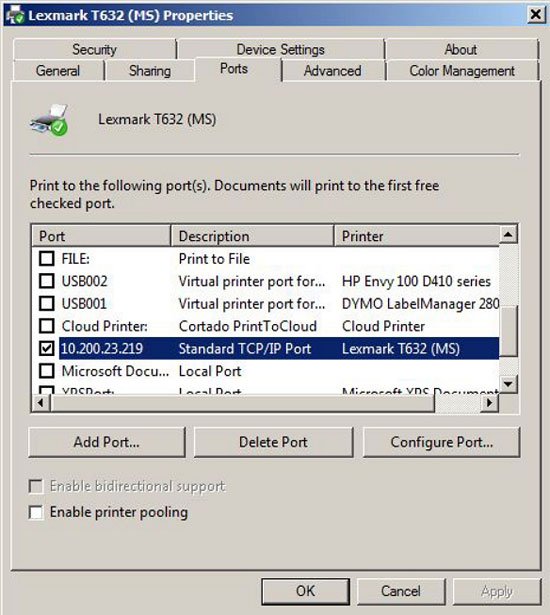
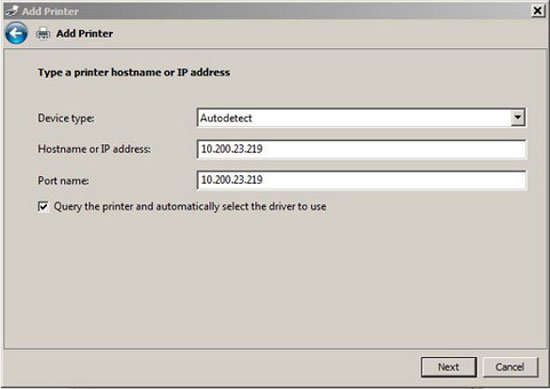
If you are lucky, choosing a printer this way will give you access. If you can not connect or the name of the printer is hidden, you can try the final option "Add a printer using a TCP / IP or hostname" (add printer using TCP / IP or hostname). Now you need a static IP address of the printer. To get the static IP address of the printer, you can go to Control Panel - & gt; Printers, right click on the printer icon to view, select Printer Properties and select the card Ports , specify the name of the printer to get the address, you will see the IP address (Figure). Then go back to the computer and type the IP address in the entry Hostname or IP Address and it will automatically appear in the field Port name (pictured below). Press next and let it automatically connect.
A variety of other issues can cause Windows to not be able to connect to the printer, even if the computer can identify and identify it. You can search more on the IT forums to find out how to fix or can follow the basic steps to process.

