Camera is an important part of the smartphone line, including Android. People use cameras to capture, save their memorable moments, or simply to selfie. However, recently many Android users have encountered the " Tiếc Camera has stopped "When opening the Camera app on an Android device to take a photo. In the article below, the network administrator will guide you several ways to fix the " Tiếc Camera has stopped "On the Android device camera app.
1. Restart the camera
Error " Tiếc là máy ảnh đã bị dừng "Appearing on your Android device may be due to the camera being used for a long period of time. To fix the error, it is very simple exit camera application , then wait for about 30 seconds launch Check the application and check whether the error still or not. When the error " Tiếc là máy ảnh đã bị dừng ", The fastest solution is to restart the application. However, this is only a temporary solution, and if the error persists you can apply some solutions below to fix.2. Restart your Android device
Usually to troubleshoot problems on the device Android as well as equipment iOS , the solution is to restart your device. So to fix the " Tiếc là máy ảnh đã bị dừng "You might want to try the solution: restart your Android device and check for errors. If the error persists then the cause of the error may be that some file on your Android device has crashed.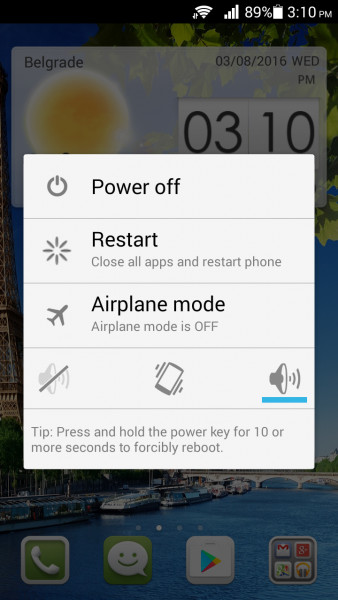
3. Delete the Camera cache file
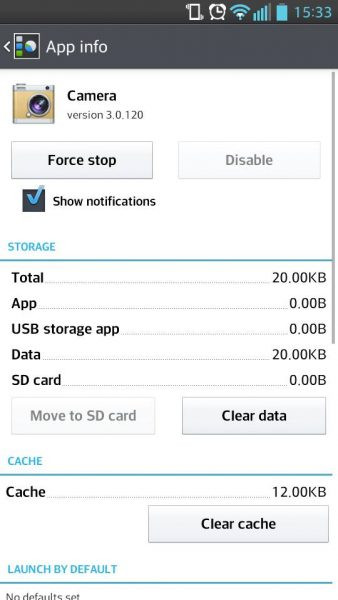
The camera cache stores files that support the Camera application to run faster. The cache files generated for the application run smoother, but in some cases these files may be corrupted and cause errors that prevent the application from using the camera. To fix the " Tiếc là máy ảnh đã bị dừng ", you can delete files This cache goes away. And you can rest assured that important data on your Android device will not be lost, but the next time you open the app, it will take a long time to load. To delete the Camera cache file, follow these steps:- Open the Settings app on your Android device.
- Locate and select Apps (or Applications, depending on your Android device), then select Application manager.
- On the next window swipe left until you reach the All tab.
- Here you find and click on the Camera app.
- Click Force Stop to finish the application.
- Then click Clear Cache to clear the application cache.
4. Delete the data file of the Camera application
While relatively cache files are harmless and when deleting these files away does not affect your application. Data files include the individual settings that you set for the application. This means that deleting data files means you will lose all your settings. delete data file In the Camera application, follow the steps below:- Open the Settings app on your Android device.
- Locate and select Apps (or Applications, depending on your Android device), then select Application manager.
- On the next window swipe left until you reach the All tab.
- Here you find and click on the Camera app.
- Click Clear Data to delete all data files associated with the Camera application.
5. Update Software
Some of the causes of errors on the Camera application may not work properly software error (software). If " delay "Updating software on the device is too long, then you should update the software to support the application on the device to work properly. The update will help you solve software-related issues. To check for the latest updates, follow these steps:- Open the Settings app on your Android device.
- Find and tap About Device.
- Click on the first option, Software update or System update.
 Your Android device will automatically check for updates, and on the device screen you will receive a notification saying that the latest update has been installed on your device or an updated version is available, You can update your device. If the update is available, then you install the update on your device and then restart the device and check that the Camera application is working properly again. delete the cache file and data for the application Gallery , follow the steps below:
- Open the Settings app on your Android device.
- Locate and select Apps (or Applications, depending on your Android device), then select Application manager.
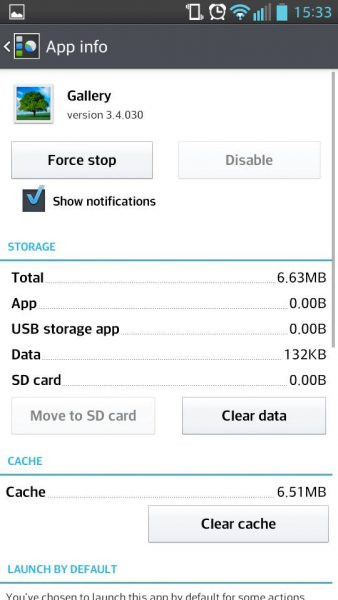
- Find and select the Gallery app.
- Click Force Stop.
- Click Clear Cache to clear the application cache.
- Click Clear Data to delete the Gallery data files.
- Click OK to confirm the deletion.
 Final launch your Android device and check See if the Camera application has returned to normal operation.
7. Use the 3rd Camera application
If you still can not fix the problem or simply want to use another Camera application, then you can access it Google Play Store , find a 3rd party camera app. There are a lot of camera applications available and you can choose to download, install and use.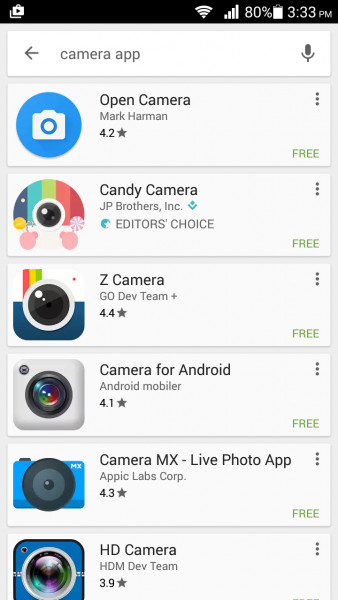 Read more Some of the best camera apps for Android devices are here
 8. Use Safe Mode
If you do not want to use the third app, and you want to fix the " Tiếc là máy ảnh đã bị dừng "On the Camera app, then you need to find out the cause of the error This is because of any app that you install on your device. To test which application is causing the error you will have to start your Android device in the mode Safe Mode . When in Safe Mode, all 3rd party applications will be disabled, so you can " Narrowing "The application scope is the cause of the error.- Press and hold the Power button.
- This time on the device screen will display a Menu with options to turn off, boot, ... your device again.
- Now press and select the Power Off option on the Menu.
- Keep pressing and holding down until the popup window appears.
- You will be asked if you want to reboot your device in Safe Mode.
- Click OK.
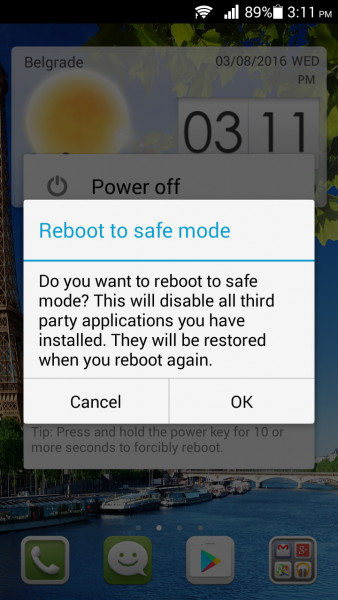 If the camera is working properly and without any errors, the cause of the error may be the third one installed on your device. You can then uninstall the applications you recently installed, or perform a factory reset. If the error still occurs, you continue the solution below.
9. Factory Reset
The Factory Reset process will take your Android device back to its original state, ie back to factory settings. This means that all data and third-party applications that you have installed on your device will be "wiped". So before proceeding with the process you should back up the important data on your device to make sure you do not lose any important data. Make sure you make a backup of all your data by moving all your important files to your storage device and backing up your Google account. Then proceed to the reset process.- Open the Settings app on your Android device.
- Locate and select the Backup and Reset option.
- Check the box next to Backup to back up your data on your Google account.
- Then click Factory Reset to reset your device to factory settings.
- Click on Reset phone.
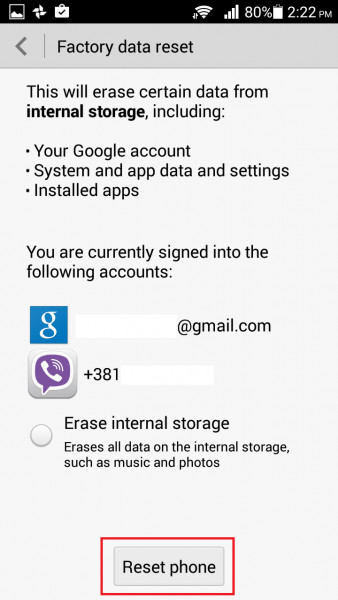 After your Android device boots up, open the Camera app and check to see if the application is working. Then proceed restore (restore) all files and restore data Your important. This solution applies on devices such as Motorola, Samsung (Samsung S4, Samsung S5, Samsung S6, Samsung S6, Samsung S7, Samsung S7, etc.), LG (LG G3, LG, ), HTC and all Android devices other.


