When making presentations, conferences, meetings, it is essential to connect the computer to the projector so that people can easily follow up. However, the connection between the projector and the computer is not performed properly, leading to problems in the process of using. If you are still struggling to connect the projector to your laptop, please refer to the tutorial below.
1. How to connect the projector to a laptop:
Step 1:
To start the projector,
Press once on the POWER button On the controller, if the light on the machine turns green is okay. If the projector is off, you may need to wait a few seconds for the fan to stop spinning and then turn it on again.
Step 2:
Next, we will
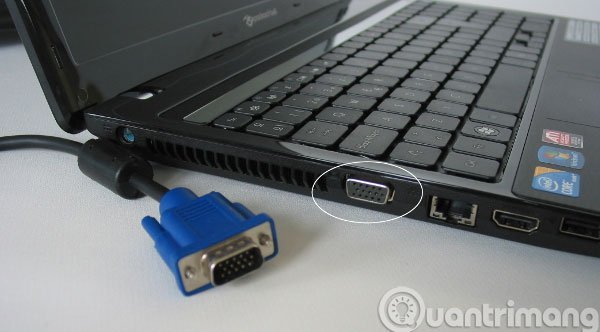
VGA connector between the computer and the projector. You need to plug in the correct connector, push it into the slot and plug it in. When unplugging, we will take the head out, not to break or bend down the plug.

Step 3:
Finally, we will start the computer when it is connected to the projector. If there is no signal, press the button again
Auto Setup At the control unit to detect the signal from the computer.
2. How to fix the projector connection to the computer:
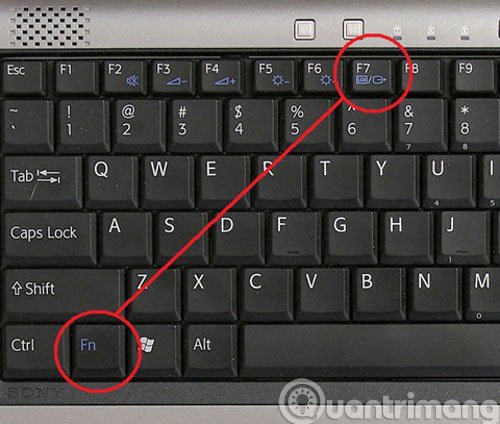
As noted during the connection of the computer to the projector, there may be a signal failure, or failure to receive the picture due to misconduct or other errors. Readers may refer to some of the fixes below. Depending on the type of laptop connected to the projector, we press different keystrokes. But first, we need to choose the mode
LCD + Monitor
- For ACER, TOSHIBA, SHARP : Fn + F5.
- For SONY projectors, IBM, LENOVO : Fn + F7.
- For PANASONIC projectors, NEC : Fn + F3.
- For ASUS projectors, DELL, EPSON : Fn + F8.
- For FUJITSU projectors : Fn + F10.
- For HP projectors, COMPAQ : Fn + F4.
- Other projectors : Fn + Key with screen icon depending on the manufacturer.

2. Desktop editing:
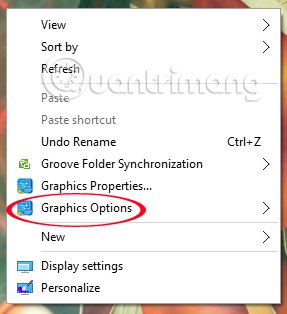
Option 1: You right-click
Graphics option & gt; Output to & gt; Intel (R) dual display clone & gt; Notebook + monitor

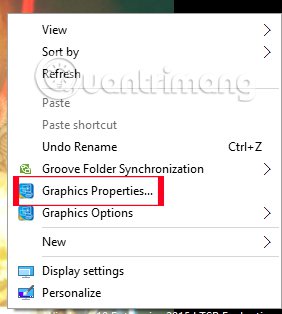
Method 2: We also right-click, select
Graphics Properties . Next, in the section
Muliple Display you tick
Intel (R) Dual Display Clone , then press

3. If the machine does not have Graphichs option and Graphics Properties:
On the Home screen, right-click and select Properties
Properties & gt; Settings & gt; Advances . Next select the card
Intel ® Graphichs Media accelerator Driver for mobile & gt; Graphichs properties In the entry
Muliple Display , we tick
Intel (R) Dual Display Clone and press
4. With a Windows 7 machine:
Option 1: We press the key combination
Windows + P then select
Duplicate Method 2: At Desktop, right-click
Graphics Options & gt; Output to & gt; Clone Displays & gt; Monitor + Built-in Display Option 3: At the screen, right-click
Personalize & gt; Display & gt; Connect to a projector & gt; Duplicate Method 4: You hit
Start & gt; All Programs & gt; Accessories & gt; Windows Mobility Center . In the table
External Display of the
Mobility Center , we click on the option
Connect Display then hit
Duplicate
5. Fixed issue with laptop with ATI and Geforce removable card:
1. With ATI removable card: At the desktop, right-click
Catalyst (TM) Control Center . At the tab
Graphichs settings to choose
Display manager & gt; Displays properties . Then right-click on the dim screen and click
Clone main with monitor 2. With GeForce discrete cards: Right-click on the computer screen, and select Properties
Nvdia Control Panel . In the entry
display to choose
Setup multiple displays . Next, right click on the screen 2 select the line
Duplicate ... You can try the above methods to overcome the signal failure when connecting the computer to the projector. Depending on the current projector used to control the shutter button or Avmute, to bring the projector to Stanby mode, temporary shutdown. To reboot, just click on the buttons above.
Please refer to the following articles:
Wish you success!


